항상 프로젝트할 때마다 여러 레퍼런스들을 보며 셋팅하기 비효율적이었기 때문에 순서대로 하면 문제 없이 렌더링 되도록 준비했다.
우린 개발자다... 비효율적인 것을 개선해나갈 필요가 있다.
- React js v18
- 상태관리 :
- 라우팅 : react-router-dom v6
- CSS : Styled-components
1. CRA
리액트 라이브러리를 사용하기 위해 터미널에서 CRA를 실행한다. 폴더 이름은 팀이 알아서 정하면 된다.
npx create-react-app setting2. 해당폴더로 이동
master인지 꼭 확인할 것
cd setting
3. 에디터 열기
code . 명령어로 안열어도 여러분들은 에디터를 열 수 있어요.
code .
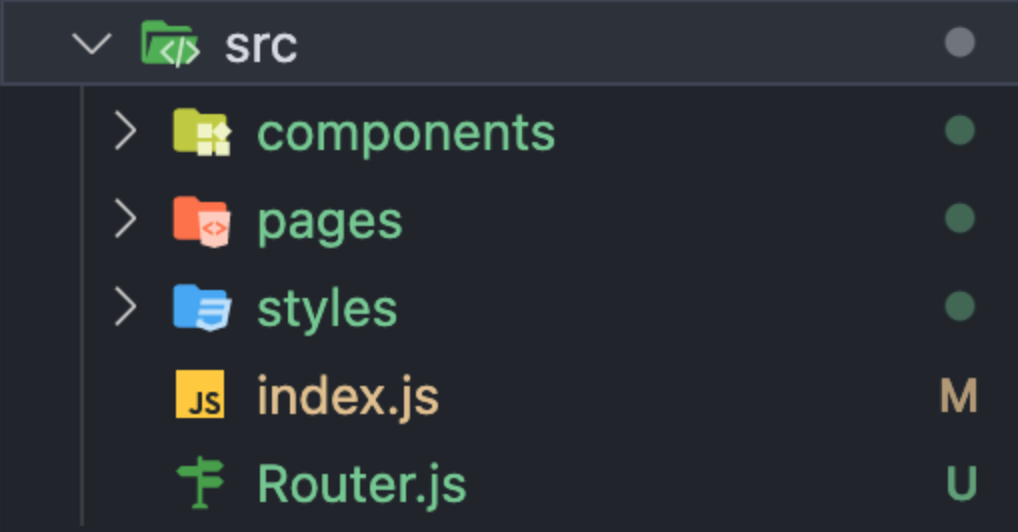
4. 필요없는 폴더 및 파일 정리하기
사진에 있는 폴더 및 파일만 남기고 모두 삭제하기

5. index.html에서 필요없는 내용 제거하기
이건 자율에 맞기지만 자율적으로 못하는 사람들을 위해서…
반대로 필요한 내용이 있다면 작성하기!
<!DOCTYPE html>
<html lang="en">
  <head>
    <meta charset="utf-8" />
    <meta name="viewport" content="width=device-width, initial-scale=1" />
    <title>settings</title>
  </head>
  <body>
    <div id="root"></div>
  </body>
</html>
6. README.md에 작성된 내용 정리하고 다시 작성하기

7. .gitignore에 .eslintcashe 포함하기

8. react-router-dom 설치하고 확인하기
install후에 pakage.json에 잘 설치되었는지 확인하기
npm install react-router-dom
9. styled-components 설치하고 확인하기
install 후에 pakage.json에 잘 설치되었는지 확인하기
npm install styled-components

10. eslint-config-prettier 설치하고 확인하기
npm install eslint-config-prettier
11. eslint-plugin-prettier 설치하고 확인하기
npm install eslint-plugin-prettier
12. prettier 설치하기
npm install prettier
13. 포맷팅 관련 설정 파일 생성하기
.eslintrc: .eslintrc
.prettierrc: .prettierrc
settings.json: .vscode/settings.json

14. data, images 폴더 생성하고 파일 넣어주고 아무거나 작성하기
data: public/data/data.txt
images: public/images/images.txt

github에 업로드할 때 폴더안에 아무것도 없으면 올라가지 않기 때문에 비어있는 txt파일이라도 작성해서 넣어준다.
15. setting.json 설정 파일 내용 입력
{
  "editor.defaultFormatter": "esbenp.prettier-vscode",
  "editor.tabSize": 2,
  "editor.formatOnSave": true,
  "editor.codeActionsOnSave": {
    "source.fixAll.eslint": true
  },
  "javascript.format.enable": false,
  "eslint.alwaysShowStatus": true,
  "files.autoSave": "onFocusChange"
}
16. .eslintrc 설정 파일 내용 입력
팀원이 모두 맥 유저일 때
{
  "extends": ["react-app", "plugin:prettier/recommended"],
  "rules": {
    "no-var": "warn", // var 금지
    "no-multiple-empty-lines": "warn", // 여러 줄 공백 금지
    "no-console": ["warn", { "allow": ["warn", "error"] }], // console.log() 금지
    "eqeqeq": "warn", // 일치 연산자 사용 필수
    "dot-notation": "warn", // 가능하다면 dot notation 사용
    "no-unused-vars": "warn", // 사용하지 않는 변수 금지
    "react/destructuring-assignment": "warn", // state, prop 등에 구조분해 할당 적용
    "react/jsx-pascal-case": "warn", // 컴포넌트 이름은 PascalCase로
    "react/no-direct-mutation-state": "warn", // state 직접 수정 금지
    "react/jsx-no-useless-fragment": "warn", // 불필요한 fragment 금지
    "react/no-unused-state": "warn", // 사용되지 않는 state
    "react/jsx-key": "warn", // 반복문으로 생성하는 요소에 key 강제
    "react/self-closing-comp": "warn", // 셀프 클로징 태그 가능하면 적용
    "react/jsx-curly-brace-presence": "warn" // jsx 내 불필요한 중괄호 금지
  }
}
팀원 중 윈도우 유저가 있을 때
{
  "extends": ["react-app", "plugin:prettier/recommended"],
  "rules": {
    "no-var": "warn", // var 금지
    "no-multiple-empty-lines": "warn", // 여러 줄 공백 금지
    "no-console": ["warn", { "allow": ["warn", "error"] }], // console.log() 금지
    "eqeqeq": "warn", // 일치 연산자 사용 필수
    "dot-notation": "warn", // 가능하다면 dot notation 사용
    "no-unused-vars": "warn", // 사용하지 않는 변수 금지
    "react/destructuring-assignment": "warn", // state, prop 등에 구조분해 할당 적용
    "react/jsx-pascal-case": "warn", // 컴포넌트 이름은 PascalCase로
    "react/no-direct-mutation-state": "warn", // state 직접 수정 금지
    "react/jsx-no-useless-fragment": "warn", // 불필요한 fragment 금지
    "react/no-unused-state": "warn", // 사용되지 않는 state
    "react/jsx-key": "warn", // 반복문으로 생성하는 요소에 key 강제
    "react/self-closing-comp": "warn", // 셀프 클로징 태그 가능하면 적용
    "react/jsx-curly-brace-presence": "warn", // jsx 내 불필요한 중괄호 금지
    "prettier/prettier": [
      "error",
      {
        "endOfLine": "auto"
      }
    ]
  }
}
17. prettierrc 설정 파일 내용 입력
{
  "tabWidth": 2,
  "endOfLine": "lf",
	"arrowParens": "avoid",
	"singleQuote": true,
}
18. components, pages, styles 폴더 생성
components: src/components
pages: src/pages
styles: src/styles

19. styled-components는 npm을 통해 reset.css을 설치하고 사용할 수 있다.
npm install --save styled-reset
20. styles 폴더 하위 파일로 GlobalStyle.js , theme.js 파일 생성
GlobalStyle.js: src/styles/GlobalStyle.js
theme.js: src/styles/theme.js

- GlobalStyle.js는 reset.css, common.css와 같다.
- theme.js는 variable.scss와 같다.
21. GlobalStyle.js를 작성한다. ( reset, common )
겸사겸사 위에서 설치한 reset.css도 같이 작성한다. 밑의 코드를 잘 보시길!
common.css는 팀원들과 상의한 후에 작성할 것, 대표적으로는 모든 요소에 boxsizing 적용하는 것이 있을 것 같다
import { createGlobalStyle } from "styled-components";
import reset from "styled-reset";

const GlobalStyle = createGlobalStyle`
    ${reset}

    * {
        box-sizing: border-box;
    }

    body{
        padding: 0;
        margin: 0;
        font-family: 'Noto Sans KR', sans-serif;
    };

    button{
        cursor: pointer;
    };

    a {
      text-decoration: none;
      color: black;
    };
`;

export default GlobalStyle;
22. theme.js를 작성한다.
const flexCenterSet = (just = "center", align = "center") => {
  return `display: flex;
  justify-content: ${just};
  align-items: ${align};`;
};

const theme = {
  flexCenterSet,
};

export default theme;
23. index.js를 작성한다.
import React from "react";
import ReactDOM from "react-dom/client";
import Router from "./Router";
import GlobalStyle from "./styles/GlobalStyle";
import { ThemeProvider } from "styled-components";
import theme from "./styles/theme";

const root = ReactDOM.createRoot(document.getElementById("root"));
root.render(
  <>
    <GlobalStyle />
    <ThemeProvider theme={theme}>
      <Router />
    </ThemeProvider>
  </>
);
24. comonents폴더 하위로 Nav, Footer 컴포넌트를 생성한다.
footer.js: src/components/footer/Footer.js
nav.js: src/components/nav/Nav.js

25. Nav,Footer 컴포넌트에 기본 내용 작성하기

26. Main 컴포넌트와 Detail 컴포넌트 생성하기
Main.js: src/pages/main/Main.js
Detail.js: src/pages/detail/Detail.js

27. Main, Detail 컴포넌트에 기본 내용 작성하기

28. Router.js 파일 생성하고 작성하기
Router.js: src/Router.js
import { BrowserRouter, Routes, Route } from "react-router-dom";
import Nav from "./components/nav/Nav";
import Footer from "./components/footer/Footer";
import Main from "./pages/main/Main";
import Detail from "./pages/detail/Detail";

const Routers = () => {
  return (
    <BrowserRouter>
      <Nav />
      <Routes>
        <Route path="/" element={<Main />} />
        <Route path="/detail/" element={<Detail />} />
      </Routes>
      <Footer />
    </BrowserRouter>
  );
};

export default Routers;
29. font-awosome 사용할 것인지 정하고 설치하고 확인하기
npm i @fortawesome/fontawesome-svg-corenpm i @fortawesome/free-solid-svg-iconsnpm i @fortawesome/free-regular-svg-iconsnpm i @fortawesome/free-brands-svg-iconsnpm i @fortawesome/react-fontawesome사용할때는 이렇게
import { FontAwesomeIcon } from "@fortawesome/react-fontawesome";
import { faMagnifyingGlass } from "@fortawesome/free-solid-svg-icons";

<FontAwesomeIcon icon={faMagnifyingGlass}/>
30. config.js 생성하고 작성하기
config.js: src/config.js

export const BASE_URL = "<http://13.125.248.213:8000/>";

export const API = {
  USERS: `${BASE_URL}users`,
};
fetch 함수 쓰이는 곳에서 사용할 때
import { API } from '../../config';

fetch(API.USERS)
31. front-end 서버를 열어서 확인하기
아무 에러 없이 Main 컴포넌트가 열리고, 1을 작성해서 렌더링이 확인되면 성공! 에러가 있다면 콘솔창을 열고 확인하기
'Language > React' 카테고리의 다른 글
| React svg를 컴포넌트로 사용하기 (0) | 2022.11.27 |
|---|---|
| React AWS Amplify DataStore Tutorial (0) | 2022.10.10 |
| React props.children (0) | 2022.07.01 |
| React Path Parameter, useParams (0) | 2022.06.28 |
| React 구조분해할당 (0) | 2022.06.18 |